Custom Snow Globe


Well, I’ve been slaving away on creating a unique X-mas gift for my wife and two-year old daughter, and I think I got it right. They loved it!

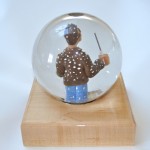
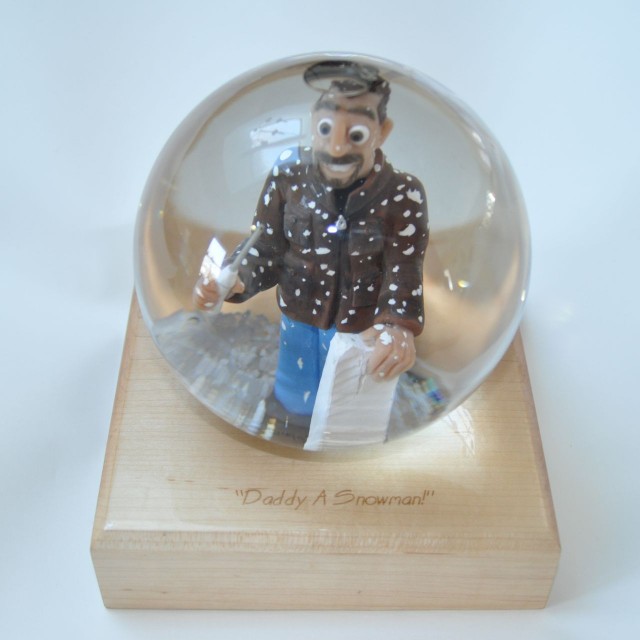
I’m talking about a Custom Snow Globe!

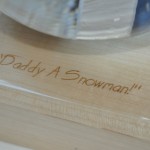
A while back, I was working in the driveway on a styrofoam project. Of course, that white stryrofoam dust gets static-charged and STICKS TO EVERYTHING. I also found that the best tool for cutting it was my wife’s kitchen electric carving knife. When I headed inside to take a break and warm up, I was COVERED with styrofoam. My two-year-old girl looked up at me and squeeled “Daddy a Snowman!”.

Indeed I was. I imagined myself inside a snow-globe with styrofoam swirling around me like a snowstorm. But could I actually BUILD a snowglobe that would match my imagination?

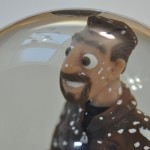
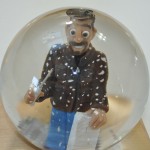
I started looking at every snow globe I could find and set to work building one. I looked around and found a glass dome, used for light fixtures. I got two of them, and gave one to my brother-in-law, who is a clay artist, among other things, and commissioned him to make a caricature of me. Since he had one globe, and I had the other, he could make a figure that would fit inside the globe, and I could do the woodworking on the base, and insure that the globe fit that.

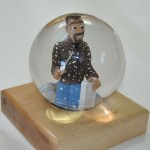
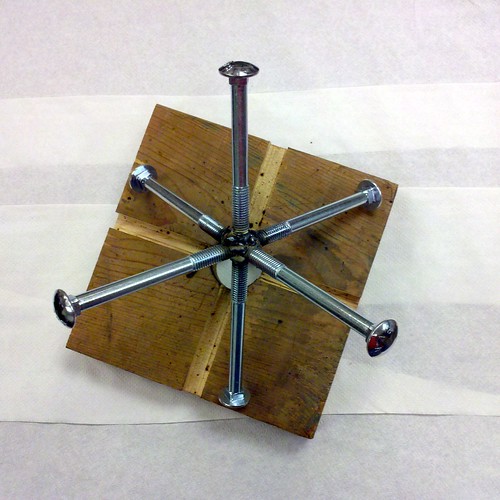
I headed to the local cabinet shop and talked to old high-school class-mate Steve about what wood to use for a base. He gave me a maple block, and I grabbed some scrap maple from the bin to practice cuts and routering on. At my Dad’s back-of-the-garage shop, I experimented with routing, until I could get it right, and routed a circle for the base of the glass globe, cut the wood base to length and cut a 45-degree bevel on the top edge, and routed a pocket in the bottom for the electronics.

I wanted to make a “singing” snow-globe, so I bought a singing greeting card at the Hallmark store, and then dissected it for parts. The electronics were then mounted on the bottom of the  wood base, along with a custom switch.

I headed to the Milwaukee Makerspace to use the laser-cutter.

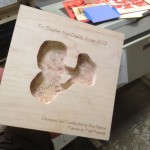
Using the vector graphics program on the laser’s computer, I laid out an inscription for both the top and bottom of the snow globe base. I practiced on a piece of paper, and then when I actually focused the laser properly and had everything else figured out, I wood-burned the maple block, front and back.

I also used a solder station to add the momentary on switch to the greeting card electronics, so that the song would play whenever the globe was picked up to shake up the snow.

Next, was clear-coating the figure and the wood base. I used “Parks Super-Glaze”, a two-part epoxy clear coat used for bars, to completely seal and waterproof both the figure and the base, as well as to permanently attach the figure to the base.

Then, it was a matter to holding the globe upside down, filling it with water, filling the routed circular grove of the base with silicon glue, and flipping the figure and base, upside-down, into the dome of water. Once it was cured, the snow-globe can be flipped right-side-up, gift-wrapped, and put under the tree!

I’m glad to say that the project turned out just great! It was a bit of a stretch to my skill-set, so THANK YOU to the people who gave me a hand with it. Nothing quite like a project that runs the gamut from sculpture to wood-working, electronics, glass, water, laser-engraving, and more! But that’s how we grow… by stretching a little bit more every time!

Merry X-mas

From Ben the Snowman.

Halloween Skull Project

I want to open my first blog post with a statement that continues to impress me: Milwaukee Makerspace is a wonderful place! I mostly show up for the free meetings.  MMS provides an excellent environment to be social, to learn (happens every time I go!), to teach (when I can!), and to get the creative juices flowing.

I had recently started working with Arduino (after a failed run at Microchip’s PIC series of microcontrollers), and was making progress quickly.  I learned how to read infrared remote control codes, how to use an infrared motion sensor, and how to control servos. What I did not have, was a sense of direction as to where to go with all of this!

After listening to the Bay View Neighborhood Associate pitch their idea of MMS helping with the Pumpkin Pavilion, and listening to Royce Pipkins describe his idea of animatronic pumpkins singing along to a song, I was struck with my own idea: an animatronic skull.

Thus, it was born!

http://vimeo.com/55121596 <- Link to the video

I’ll post more details in a following post about how I built this guy. :)

Many thanks to Royce, Tom G., and Ed C. for their help on this project!

MMS Eclipse watching party

Although poorly attended (only one full and one future member) everyone had a great time observing the 98% solar Eclipse.

Using the official MMS pinhole card:


Too bad the eclipse image is so poor, what a minute – whats that on the building next door?


Openings between the leaves of trees are acting as pin hole cameras and giving hundreds of images of the eclipse, we felt a little silly looking at the tiny ones the card was making for the first half hour :-)

You can also see some on the leaf in the foreground (I’m writing this on an old netbook so I can’t tell how the pictures are coming out, so I didn’t clip or tweak them)

And just so you don’t think its some other effect, here’s a shot at the max we witnessed, notice the arc is at the top instead of the side:

I’m still not sure why we had such a poor turnout, after all its only a 36 hour drive to San Francisco!


Makerspace Represents at Made in Milwaukee (Sept 3rd)

Made in Milwaukee

CATHEDRAL SQUARE PARK – September 3rd, 2011

We here at the Makerspace are always looking for ways to reach out and raise awareness in the community of our existence.  When an opportunity like Made in Milwaukee comes along, how can you pass that up.  We will be at this festival (click image above for more info) all day showing off our inspiring creations and supervising hands-on maker activities.  So please stop by our tent and show us some love!

I’m welding! I’m a welder now!

Well, ok, i’m a pretty poor welder, but i’m only making oversized jacks, not bridges, so i’ll take it.

I am making an oversized game of Jacks.  Originally i thought i could use some steel rods, someone suggested tire irons and i picked up a 3/8″ threaded rod (Home Depot trip #1) to try out.  After i talked with Tom and Rich a bit they suggested that i use Carriage Bolts instead of a bare rod.  This looked great because the carriage bolts have a nice rounded end that help make the object really look like a jack.  Ok, materials were set, so i ran to Home Depot (trip #2) with Matt G.
 

After returning with a set of 6 bolts to try things out with, Tom came up with a nice jig for me to use with slots for the 4 bars and a vertical hole so i could stand the bolts up.  We dug through the scrap wood box and found a good piece and a few minutes after i plugged in the table saw, i had the channels cut out.  Next up was the center hole.  Rich gave me a quick tour of the drill press and we found a good hole saw to use and then my jig was complete.
 

Now onto the welding!  Rich set me up with our MIG welder, which is pretty much as simple as it gets.  Lay out and secure the pieces, put the clamp on one end, point and pull the trigger.  We quickly had our first jack.  At this point in my career as a welder, i am a firm proponent of the “More Weld” school of structural engineering. I know some of the academics in their ivory towers may frown on this, but I’m ok with that.
 

Jack and Jig
 
With the proof of concept ready, i headed back to Home Depot (trip #3) to get a couple boxes of bolts.  After returning to the space, i cranked out 8 more jacks, low-efficiency assembly line style.
 

We had some fun tossing them around the space.  They make a great sound when you roll out a pile of them and look great bouncing off the cement after being flung 15 feet in the air.  The other folks at the space had a good laugh at my ridiculous build.
 

We’re going to have a test game with the jacks at the space on Tuesday.  I’m not entirely sure how many of these things someone can pick up quickly, but we’ll find out soon.  Why am I building an oversized game of jacks?  Well, that’s a bit of a secret for now.  :)
 
Jacks and Feet for Scale